Showing posts with label tyranids. Show all posts

Tuesday, August 31, 2010

Pheromones and Shadows- HF Izanagi Lictor 1

As promised - my first and last Lictor done in the Izanagi Hive scheme! Last, you say? YES. I'll explain later. For now- enjoy the first of several shadows I intend to deploy for HF Izanagi!!

Side-View: This is probably my favorite angle- it makes him look like he's about to rip some unsuspecting victim's face off. I decided to do the SM helmet in a Ultramarines-type color scheme, with the usual rust. However, I wasn't convinced at the time of photography. I'll be adding a bit of a wash or more stippled brown to the metal to simulate the rust and damage done by time.

3/4 Front : This model I ALSO sprayed with the matte sealer, but at the 50% mark- right before the feather-work, and a much lighter coat. I noticed a bit of the chalk-effect, but it doesn't detract from the overall model itself. (at least, I hope not) Also, the feathering is much finer than that done on the Tyrant... perhaps ANOTHER redo is in order for the big guy? My only concern is if it was enough of a coat to protect it...

Front- Tentacle View: As I said in a previous WIP post, this model was entirely pinned, then glued, to make it rigid enough to support the dynamic pose I wanted without shattering to pieces during transport or snapping off a limb due to unbalanced weight. The resulting "Bruce Lee wah-taaah" pose made it very easy to paint this model- a very good reward for taking down the Tyrant. The tentacles I did much the same way as the Zoanthrope, but hit a few angles with the old GW Ork-Flesh Wash to add depth and the "slime" aspect.

Back View: A shot of the back-carapace. This is what I felt was missing from the Tyrant- a characteristic shell. The spraying disaster kinda took the wind from my sails, and I was only concerned about saving the colors, rather than doing something spectacular on that particular model. This model has a raised arch-hood on the back and spikey protuberances running along his sides. (much like the horned ridges on the Zoans) I decided to run a line of red down the center and sides, then highlight it all. This ends up separating the black color, but making it into something more interesting to look at. What do you think?

Back-Left View: One final shot of the tail, the scythe, and left hand. I noticed that a lot of the Lictors for the standard GW Hives have the arms painted up in one color- including the scythes' 1st elbow spike area and carapace-like structure up to the sectioned scythe itself. I took a chance and veered away from that; I painted the entire area shoulder-to-1st-joint black, and feathered it with the red, and I'm pretty happy with the results.

So? What do you think? Any critiques or comments are always welcome- helps improve the standard of work! I plan to use this guy to go deep, rattle tanks and heavy weapons squads to help my 'stealers get in close without/before being blasted apart- we'll see how that pans out...

Oh yes, about the "last" Lictor thing- I wanted to see one in the standard scheme just to make sure nothing was "off" about it. I think it fits in quite well, but I have several techniques I intend to practice on my next set of these badboys. One, I intend to try a variation on Sky-Earth NMM type reflection, but it'll reflect the reds and yellows of the sky with the black smoke plumes, the building rubble towers on the ground... basically a 360-degree mirror of an entire urban landscape gone to hell... The one after that... well... that one, you're just going to have to wait for- it's going to border on a diorama/playing piece...

--END SYNAPTIC TRANSMISSION--

Monday, August 30, 2010

Musings and Upcoming Hive Fleet Izanagi Pictures


Ah... grueling Mondays- how I love them. This is going to be short entry- basically just my ideas to myself for posterity and further consideration when I have some time. Also, if I could get some feedback on #3, that'd be much appreciated-

1) Spurred on by the completion of the Tyrant, I went on and actually finished/based my Lictor. (and half-finished a simple objective marker!) I'm liking the army the more I paint it. I'm actually trying to play my first-ever game of WH40K this Labor Day Weekend! Going into battle with a Tyrant, 8-man 'Stealers and Broodlord, Tyrgon Prime, 16 Horms, 16 Terms, 3 Ripper Swarms, 3 Warriors, and a Zoanthrope. Very excited- regardless of the outcome!

2) I've decided that until I get a new troop type (gargoyles), there'll be no more pics of the generic Horms, Terms... etc. - with the exception of my 'Stealers, as I haven't gotten around to finishing their bases yet and photographing them. Troops are like most of what I make, up-to-my-standard, but a waste of time for viewers unless there's something awesomely converted about them. Mine are painted nicely, but standard and not worth your time, IMO.

3) I'm also jumping onto the Warhammer Fantasy Bandwagon in between grad school, my Tyranids, and family life. I'm pretty new at the blogging game, but have wanted to do it for a while. I'm going to start a Vampire Counts army and will definitely post my stuff on a blog. Question is- Should I use this one and mix them, as I've already been doing with my custom works? Or start a new one for WH Quest and Fantasy? Advice is greatly appreciated.

Anyways, thanks for staying tuned. Oh yea, before I forget. Does anyone have any blogs they wanna share with me? Something you gentlemen/ladies think it would do me good to see? (I realize that was some really outdated English and apologize) If you have any recommendations about a blog you think I should be following, let me know- I'm always on the lookout for inspirations and kudos where it is deserved for an excellent paintjob or concept!

Friday, August 27, 2010

Hive Tyrant Painting Disaster Bonanza!

FINALLY finished. In addition to the painting troubles, I ran into additional construction and spray-sealant roadbumps... nay, potholes of unbelievable tire-busting size, on my way to the finish line. Following this short rant of the problems, I'll make up for it with lots of pics followed by the description bit. I thank all of you for your patience- this model has been extremely trying to say the least. Actually, here, I'll give a picture just to keep you with me a bit longer... then I'll rant, then I'll continue. How's that?


1-The flexible nature of the greenstuff (and even this stuff is pushing it- you'll see it below) goes against the rigid dry-form of the paint- while doing certain areas, I'd accidentally "rest" the tentacles on the table and put a little weight on them, this reformed the shape of the tentacles and "cracked" the curved stress-points... more paint-over and highlighting to cover the damaged paint job. FML.

2- Oh GW Sealant... damn you to the lowest pits of hell... In order to fix the paint-chipping by fingertips, I attempted to put sealant on the model "during" painting- and by during, I mean when the damn thing was almost done. To be fair, I've done this with my Zoan, and it came out beautifully. BUT... it was still in-progress, at the 35%, 65%-percent way marks. After spraying, my victory-grin turned into a fury-rictus as I saw that the goddamn spray had TURNED MY EFFIN' MODEL CHALKY WHITE!! YOU &@!@#*!ING PIECE OF S#!T SPRAY!! I OUGHT TO BREAK EVERY BONE IN YOUR WORTHLESS BODY AND LEAVE YOU CRAWLING HOME ON YOUR GODDAMN CHIN LIKE THE SPINELESS WORM YOU ARE!!!

*ahem*...After stomping around, a cigarette, and half a litre of crap Japanese sake in about 20 minutes... I calmed down and thought about how to fix it. I have a feeling I had a problem like this with my Zoan, but the added paint covered the mistakes. This one... I used successive washes of Baal Red, Badab Black, and oldskool Red Glaze to "repair" the paint job. I tried my very best to repair this, and here are the results.

Presenting... Izanagi's Hive Tyrant w/ funky custom implanty-things that I have no idea what they represent!!

Front Shot- This is the result after several washes of color to darken the chalked up POS that was the Tyrant. One thing I noticed is that there is a LOT of feathering... I think if it was a standard Tyrant, it might have been ok, but he's veering off into a totally different scheme with so much red- I didn't take into account the 6 extra back-housings and 6 extra tentacle heads.


Left Side- The scythes and gun-arms are magnetized- another reason I felt it necessary to seal the parts was also to present the damage from clamping and unclamping the arms- paint chipping sucks. I'll let you know if it worked out or not.


Back-Carapace- I thought this was fairly successful in its execution- at least, after I washed it and re-highlighted it. Remember how I said there were problems with the cracking paint? It's not only the paint- before primering, I noticed that one of the tentacles' greenstuff was also cracking, probably due to improper formation onto the copper wire. Yup, it's the one on the top-right: see how the bottom of the tentacle is mangled and crappy? That's my attempt to reinforce the cracks that formed (and the horrible FAIL that followed) Perhaps for my V2, I'll find some better material to make it out of.


Venom-Cannon Detail- For this part, I wanted to model after the original Tyranid Warrior- part of me tells me the vine hanging from weapon-to-freehand might have been better as just "grey"... but who am I to listen to the voices talking in my head? I tried it, I like it- I tried to freehand the plastic detail into venom veins that ran all throughout the pipe.


Base Detail 1 - Skeleton and bio-receptacle. Again, the theme for my army is that this Fleet has eaten away nearly every living thing on a world in an urban enviroment- nothing really remains. If you think Fallout (any fans??) they at least have grass on the ground. I used one from the Vampire Counts Skeleton collection- the open mouths and damaged skulls are perfect... oh yea, and the rest of the bodies too. I think I'm going to start adding cracked concrete and roads, etc. for my follow-up minis.


Base Detail 2 - Destroyed banner and rubble. Also another component from the VC Skeleton set. I didn't really know what I wanted to put for the flag- not a red one, certainly, and I thought white or cream would be a bit too "pristine". I decided on a mustard yellow with Devlan Mud wash and slight Bleached Bone highlight. I freehanded an 'X' (I imagine army banners to start w/ the legion name- like the 57th Hellfishes, etc.) with washed down Chaos Black and Codex Grey, all while the Devlan Mud was drying. For the banner pole, I originally imagined it to be shining silver but faded and rusted all to hell now. I used Boltgun Metal w/ a heavy Devlan Mud wash, then stippled some Scorched Brown and Snakebite Leather to simulate severe rust. Result was so-so. I'd rather stick w/ drybrushing, where I have more control. More practice is needed w/ Stippling Brush, I guess.


Armless Tentacle Detail 1 - These pictures are not as good- I just wanted to show the tentacles without the other bits getting in the way.


Armless Tentacle Detail 2 - I'm overall pleased with the result, but definitely have some pointers for my next Large monstrosity- the Swarm Lord. Sword... TENTACLES?!?!?!


Side Close-Up with Head Detail- if you notice, I cut off the small "beard" spike on his chin- No, really. Check the GW website Hive Tyrant. Sorry, that part of it just wasn't doing it for me.

Well, I hope you all enjoyed this presentation. I think he'll make a great centerpiece, but by trying to make him less-fragile, I actually did the opposite. I have no idea how he's going to be transported- I think I'm going to have to make a custom case or some thing for him, otherwise, he'll just be a home-field model.


One last pic- ...Ok... while everything didn't really go according to plan, I got to the finish line, and I think he'll make a fine centerpiece for my army! FORWARD!! THE HIVE MIND COMMANDS IT!

Thanks for staying tuned! Next up- Lictor!


--END SYNAPTIC TRANSMISSION--

Tuesday, August 24, 2010

Rise of a Tyrant


Hell if I know this band.. not a fan of metal of any kind...

Lictors and troops were supposed to be on the menu, but instead, the Hive Tyrant is getting finished. I wish I could say that this was an enjoyable painting experience, but the project was plagued by several problems and oversights. That, and I underestimated the scale of the model- I thought it would be like painting a standard 28mm bug, but bigger. Yup... definitely underestimated.

1) I tried to clean him up as best I could, but with so much detail, I found there were several points I didn't file, slice, etc. before primering the product. FML.

2) The guy all glued together, plus those funky tentacles I made of greenstuff, bits and wires, made hitting a few places a real pain. Now I've got a couple spots on the whole of the model marked by an accidental tip of my paintbrush. My only saving grace was that his arms are magnetized. Those things helped the painting a bit, clearing up space instead of having more odd spikes and bits in the way of the nooks and crannies.

3) The tentacles aren't solid- they have some "spring" to them, and the odd angles they're placed at took time to get all the painting squared away on them.

4) The feathering... Ooooh... the feathering. I know you're supposed to take more time on a "leader" model, make them stand out... look good... but this was just ridiculous. The color palette for the red/orange/peach color consists of 6 different layers. With so many places needing the color, it literally takes 1 hour or more for a single layer of feathering. But by jove... I did it.

5) Paint rub-off. I had to hold him on the model at times to get those hard to reach places. Now it's time to go back and get those areas that I painted but rubbed to paint other areas... in Japanese, we call this an "akujunkan", or vicious circle. I fear that as I paint those parts that I painted but rubbed off, I'm going to rub off other areas, and this cycle of evil will continue... until I throw this model against a wall in frustration.

For future reference... I'm probably going to paint large models piece by piece... and inspect any large models piece by piece (which I thought I did this time, but apparently not thoroughly enough...) I'll be posting pics of the finished project- base and all on my next set.

Stay tuned, and here's hoping I can finish strong on this monster...

... and then I remember I have a Trygon/T. Prime to paint down the line... *sigh*...

Monday, August 16, 2010

New Tyranid Army Pics 4

Alright, this is my final update before I start getting onto some new stuff- I've been working on a group of a Lictor and four more Hormagaunts, and they should be ready later this week. I had an ambitious schedule to finish those by today, along with another Anima Tactics figure- the Colonel, but ended up pretty far short due to studies and family life... and that new XBOX Live Castlevania game... *sigh*... But enough talk! Have at it!

Presenting the photobox pictures for my finished Termagaunts and Ripper Swarms-


Group Shot- I love the ease at which I finish these little guys... After my Warriors, I was on a roll and followed up with the Rippers. Too bad my "Oh, this is gonna be easy!" streak hit the wall after meeting the Hormagaunts, 'Stealers, and Termagaunts.


Shot of 1 group- Love that tusked-one... I might just have to buy another Termagaunt box to get another group- I'm definitely going to have the Parasite special character and Tervigons, so I might as well...


Another group... if only the rest of my troops painted up as fast...

And onto the Termagaunts -


Group Shot- I initially thought of magnetizing my entire army, but then I figured that these guys are cannon fodder, and even if they do suck donkey balls at everything, I can double these miniatures (the dead ones, in-game, anyways) as Tervigon spawn as well - as they come out standard w/ Fleshborers. These guys are kind of a fluke, and I'm wondering if I should redo the gray to their bodies- it was with the previous Zoanthrope that I started them... and new brushes. I had some extreme drybrush malfunction when I did the highlights. That, and I was too drunk at the Hobby Day BBQ to care that much. We'll see if I have time for redos.


I can say that these guys are probably my least favorite model to paint- lots of complex areas- the tail especially- as some of it I just highlighted the up-raised ridge bones, and some of them have the entire triangle encompassing their tails.


One last shot- I'll never give up and paint these guys with "speed"- 4 of them can take a day or more, but I'm in no hurry. I want a good-looking force, even if I'm getting whipped.

And actually, on a final note... I lied. I still have my pretty-much-finished Genestealers. However, I may just finish them all together with the other 4 awaiting their paintjob, and then take pictures. But from here on in, it will be all new pictures- like I said, next on the chopping block is my Lictor! Stay tuned!

Friday, August 13, 2010

New Tyranid Army Pics 3

This time I took some pictures of my fully finished Hormagaunts. The rank and file troops usually aren't that fun, but I had a good time doing these little guys. I plan to have at least another group of these, but for now, I'm going to wait until I finish the rest of the battle force, my tyrant, lictor, and trygon.


Group shot of the scythed group- I put the adrenaline sacs on their backs, as I liked the look of them from what I saw in the codex in the other models. That, and they would have their requisite "green" to tie them even further with the rest of the army.


Shot of two- no idea which ones. I'm not satisfied with the green sacs on their backs, and I'm probably going to redo them, as they lack the "wet" look and have a bit too much white highlight.


Shot of the other two... nope. I lied. Damn bugs all look the same! I was in a hurry (and studying for the GMAT at the time- two weeks before the test, I bought the boxed set... NOT smart) as the seams don't clearly match up on the faces and I probably left a lot of mold marks on without filing them off. Ah well... first army. The rest of the stuff I have now are filed to perfection.


Here are the other two- I thought I'd be doing them in groups of 4, but in an effort to streamline the process, I have the 16 waiting models already sprayed with the body color, washed, highlighted, carapaces painted black, and scythes colored the base brown.


And one final, raised shot.

Now to figure out how to do an entire army shot... I've got some time, but it's still on my mind.

Thursday, August 12, 2010

New Tyranid Army Pics 2

These were the first-ever Tyranids I've painted- on the past posts, I had trouble getting the fiesta-red feathering idea off the ground. But with a bit of help from CMoN and Dakka, I got them finished and took the initial pics directly on my art desk. Like the past Zoanthrope, it's time to replace those ones with the "nice" pictures and photobox. Again, courtesy of the ideas and backgrounds found on Corvus Miniatures- I don't know the artist/blogger personally, but if you haven't been- GO. Inspiring style of painting and it's where I found the ideas for the MacGyver photobox.


Group shot of the Battle Force Warriors (3)- two with Deathspitters, and one with a Venom Cannon. This was before I began my experiments with magnets, so these are permanent additions. But any large, modular character(s) from here on in is done via magnet- and this will include future Warrior broods.


Side View Detail of Venom Cannon- I noticed that the Tyranids painted by GW had most of the piping and weaponry painted to match the body- I can imagine that the quality the 'Eavy Metal painters and relatively simple style saved lots of time when painting the entire Behemoth/Kraken fleets for photo shoots. However, while I bow to the skill of 'Eavy Metal, I wasn't really a fan of the simplicity of it. So I decided to color the piping with some colors to catch the eye- mainly wet fleshy looks with the alien green details I had decided on.


GET SOME!! Front View w/ Detail on Venom Cannon piping. The venom veins were done with a small line (here, unlike other cases, an unsteady hand is alright and makes it look more natural) of Dark Angels green, then some areas with DA/Scorpion Green mix, with final highs of pure Scorpion and some very light Skull White tints. I also like the pictures on the GW boxes, with the Tyrant, Warriors, etc. firing off their weapons, so I drilled holes in the VC and put a bit of Scorpion to mimic the ooze after blasting away.


One of the Deathspitter Warriors. In order to keep with the scheme, I decided to detail the "eye" found on the guns with the same green highlighting as seen above to tie it in with the rest of the army.


Another view of that same Tyranid Warrior. The bases on these guys (hell, the rest of the Battle Force too) are relatively simple- some debris and parts here and there, but only one dimension. For future models, I've been inspired to make steps or inclines to add some depth... and seeing as how the ground is urban landscape, I wouldn't be that far off making some of my 'nids step on cracked Imperial roads either...


The 2nd Tyranid Warrior w/ Deathspitter- what I SHOULD have done with the previous one. The guns look a bit plain, so I used the GW drill to cut a "honeycomb" (er, holes?) shape into the nozzle of the gun... I might just bite the bullet and do it with the other guy, then paint in the holes to hide the gray plastic.


Side-View of 2nd DS Warrior. I've gotta say- I started with the nearly 100% metal miniatures- the only plastics available at the time were boxes of 10 same-pose minis. These guys have come a long way, and I'm extremely pleased with how the Tyranids have evolved... and probably the reason why I came out of hiding after 10 years and started a bug swarm!

Wednesday, August 11, 2010

New Tyranid Army Pics 1

While I do my wholesale army painting, I'm going to be putting up "better" pictures of my army- basically, whatever I have finished (bases and all) . Say goodbye, paint desk! While I personally enjoy my guys running around my GW paint pots, they don't make for very nice pictures. So... here is the final Zoanthrope (revealed earlier on Memorial Day- totally complete)


Head Design Detail - originally I planned to do some sort of insect mimicry "eyes" on the foremost part of the shell, but it just didn't work out and the pattern just didn't pan out with the previous scheme I planned out.


Side view w/ brain detail... mmm... braaaaiiinnss...


Back-Vent Detail- Next project after the rest of my collection is complete is to add special characters... Doom is up next. I've seen some good ones out there that I've taken a few concepts from.


3/4 View and detail on base. I imagine my swarm to be the tail-end of a conquered urban landscape, so again, no fresh blood and guts on my bases (though, it would be cool to see more dynamic models) and 'worn' items - the helmet color I'm not too pleased with. I thought DA Green would be perfect for it, but it was a bit too fresh looking for my tastes. Ah well. Live and learn.

Wednesday, August 4, 2010

Photobox and Future Updates

Finally made a Mac-Guyver photo booth...

I've been meaning to do this for a while, but I finally got around to creating myself a version of the home-made photo-booth featured on a blog I follow- Corvus Miniatures. On one of his older posts, he's got a way to make a thrifty photobooth out of a cardboard box, backgrounds provided on his site, and aluminum foil. I already took some test pics on my Zoanthrope, and the result is much better than any pictures I've taken thus far.

Corvus' blog is inspirational for painting and modelling ideas, and I definitely recommend checking it out if you've never been-

http://corvusminiatures.blogspot.com

Anyways, this blog is going to be a bit inactive while I try and complete the following (in no particular order)-

1 - Paint up my Hurn Warrior
2 - Paint up my Cloud conversion
3 - Finish up my bases for my army models
4 - Finish up basing and spraying my Trygon

The bases for my army models will probably go first, as I can knock those out in an hour or so once I get an effect I like. Then, I can take some pictures of them in style, instead of on my paint-flecked art desk.

For my next post, I'll be setting up my Fleet Izanagi army gallery. For now, please enjoy the new layout- I set up a gallery for the Cloud WIP on my "Works in Progress" page, and an actual standard gallery for the "Glimpse of Izanagi" slideshow on the 'Gallery' section.

--END SYNAPTIC TRANSMISSION--

Monday, July 12, 2010

Know Thine Enemy

I promised this post earlier, but too much awesomeness in the form of my Octo-rant got in the way. Actually, he's got more than eight arms... and I almost thought to call him a portmanteau of Hydra+Tyrant... but calling him a "Hydrant" just doesn't do him justice. BUT... on to the main attraction. I promised a look at my hated enemies- the Imperial Guard currently being created by my cousin. I'll be taking more pictures later as he finishes, but he's taken great care to make his men look like they've deep in the action- the extras, the 40K Basing Kit, sand and gravel all give a look like they're in the middle of a warzone. He's also used green-stuff to create "mounds" and make the ground uneven. I've not seen how that looks yet all based/painted up, but I think it's a great idea. Anyways, onto the main attraction-

1) So I guess I should start out from the very beginning- out of all the races available to you in WH40K, why in God's name did you choose the Imperial Guard?? I mean, uh... what about them made you want to collect an army to paint/play/compete with?

Why indeed? There goes the argument that you would want to paint and play with something exotic, different; the idea that the army, like playing a hero in a video game, allows you to be more much more than you already are. The 40k universe is filled with all sorts of legendary warriors: lithe Eldar, weapons, tanks and armor sleek as sin and twice as deadly; the mighty, mighty Adeptus Astartes, the Space Marines, the heroes of the Imperium themselves, and the Tyranids, utterly ferocious, bent on the consupmtion of life as we know it. All of these forces are super human, unimaginably deadly, and just damn cool.
So why Guard?.... FOR THE IMPERIUM!


The Guard doesn't need highly trained warriors, swift and deadly, or psychers that control the very fabric of fate. The Guard doesn't need superhuman enhancement and tank like armor.The Guard doesn't need the driving force of a hive mind and monstrous beasts of cruel destruction. The Guard is relentless, slowly grinding it's opponents to dust under boot and tread. The Guard is is numerous, men and women, REGULAR men and women selling their lives dearly in defense of the Imperium. The Guard is driven by it's faith in the Emperor, an unimaginable war machine, facing the horrors of the universe with lasguns and courage.

I play the Guard because, in this whole universe created by GW, the lowly Guardsman is the underdog. I play the Guard because I can feel empathy towards their desperate struggle against unbelievable odds. I play Guard just because they are damn cool.

Oh, and tanks... God I love tanks... and come on, who didn't love the little green army soldiers we got as kids?The amount of (given, inaccurate) firepower I can call on with a Guard army? *wargasm


2) Tell me about the back-story for your army- I know Nerd when I see it (takes one to know one, and all that)- and I'm sure you've thought of some sort of fluff for your army? What do they call themselves? Where are they from? What is their purpose in "life", aside from being swept aside by the Izanagi horde? ... jus kiddin' Lian. Tell me about them.

Hmmmm... I've given it thought... but haven't really come to many conclusions. I'm an Angel/forces of good and light freak, so that kind of motif might be nice. Invictus System, Hive World Angelus, Angelforge? The 501st Angelus, the "Iron Saints". A lot of this is admittedly taken from other sources (DoW II, one of the main Hive Cities is called Angelforge and the Iron Saint is an award winning Baneblade model), but I really like the sound of that.


As for backstory, I remember you saying that you wanted your force to be representative of a fleet from a campaign pretty much drawn to a close. No spearheads of Carnifexes to knock aside armored companies or masses of firepower and MCs running around. Deception is your stength, surprise and stealth your weapon. So, we can say that you are already upon Angelus, Angelforge itself overrun or in the process of, and we, the Iron Saints, last army to be raised from the Imperial Tithe, is recalled to reclaim their home planet. Therefore, the army is largely green, plainly dressed and armed. But, as the fighting goes on and the troops become grizzled verterans... who knows what the models will look like and be armed with in the future...

To be continued....


3) I remember your old models and your new ones have more of a crisp/clean feel, and definitely a big improvement. We won't get into them, because to make it even, I've gotta show my original crappers, too. So tell me about the paint-scheme. What was your inspiration for the color scheme?

While I like bright colors and the potential reds, greens, and blues and the like have in really making a model look pretty, let's not lie to ourselves; we're soldiers, trench dogs rolling in the mud and blood of combat. Who in their right mind goes into combat wearing a damn red shirt? (Editor's Note: Heeey... I play a "salmon-colored" Master Chief in Halo...) So, I took two darker much more neutral tones I thought worked well together: khaki and grey. Really, the idea came from looking at Armageddon themed tanks. I thought, if it can work for armor, why not the men? And voila, here I am today... :P a little catachan green for the weapons, blues for the glass and red for the wire to add color accent and their you go. Subtle, but pretty...


4) And one last question- You've currently got a box set, sentinel, chimera, and one of those bad-ass Leman Russ tanks that we know and love. Anything special planned for your vehicles, in regards to paint scheme or modelling? What, if anything is your next purchase?

Just a few touches like camo netting rolled up and placed on the tank, magnetizing the new turrets so I can switch up the main guns (and hopefully sponsons). Next purchases will the the dead sexy Valkyrie (with a veteran squad to ride it) and that wargasmic Manticore. Nothing makes infantry go poof better than D3 str 10 pie plates.


Looking forward to seeing the Iron Saints go head-to-head with Hive Fleet Izanagi!

Friday, July 9, 2010

WIP Octo-Tyrant!!

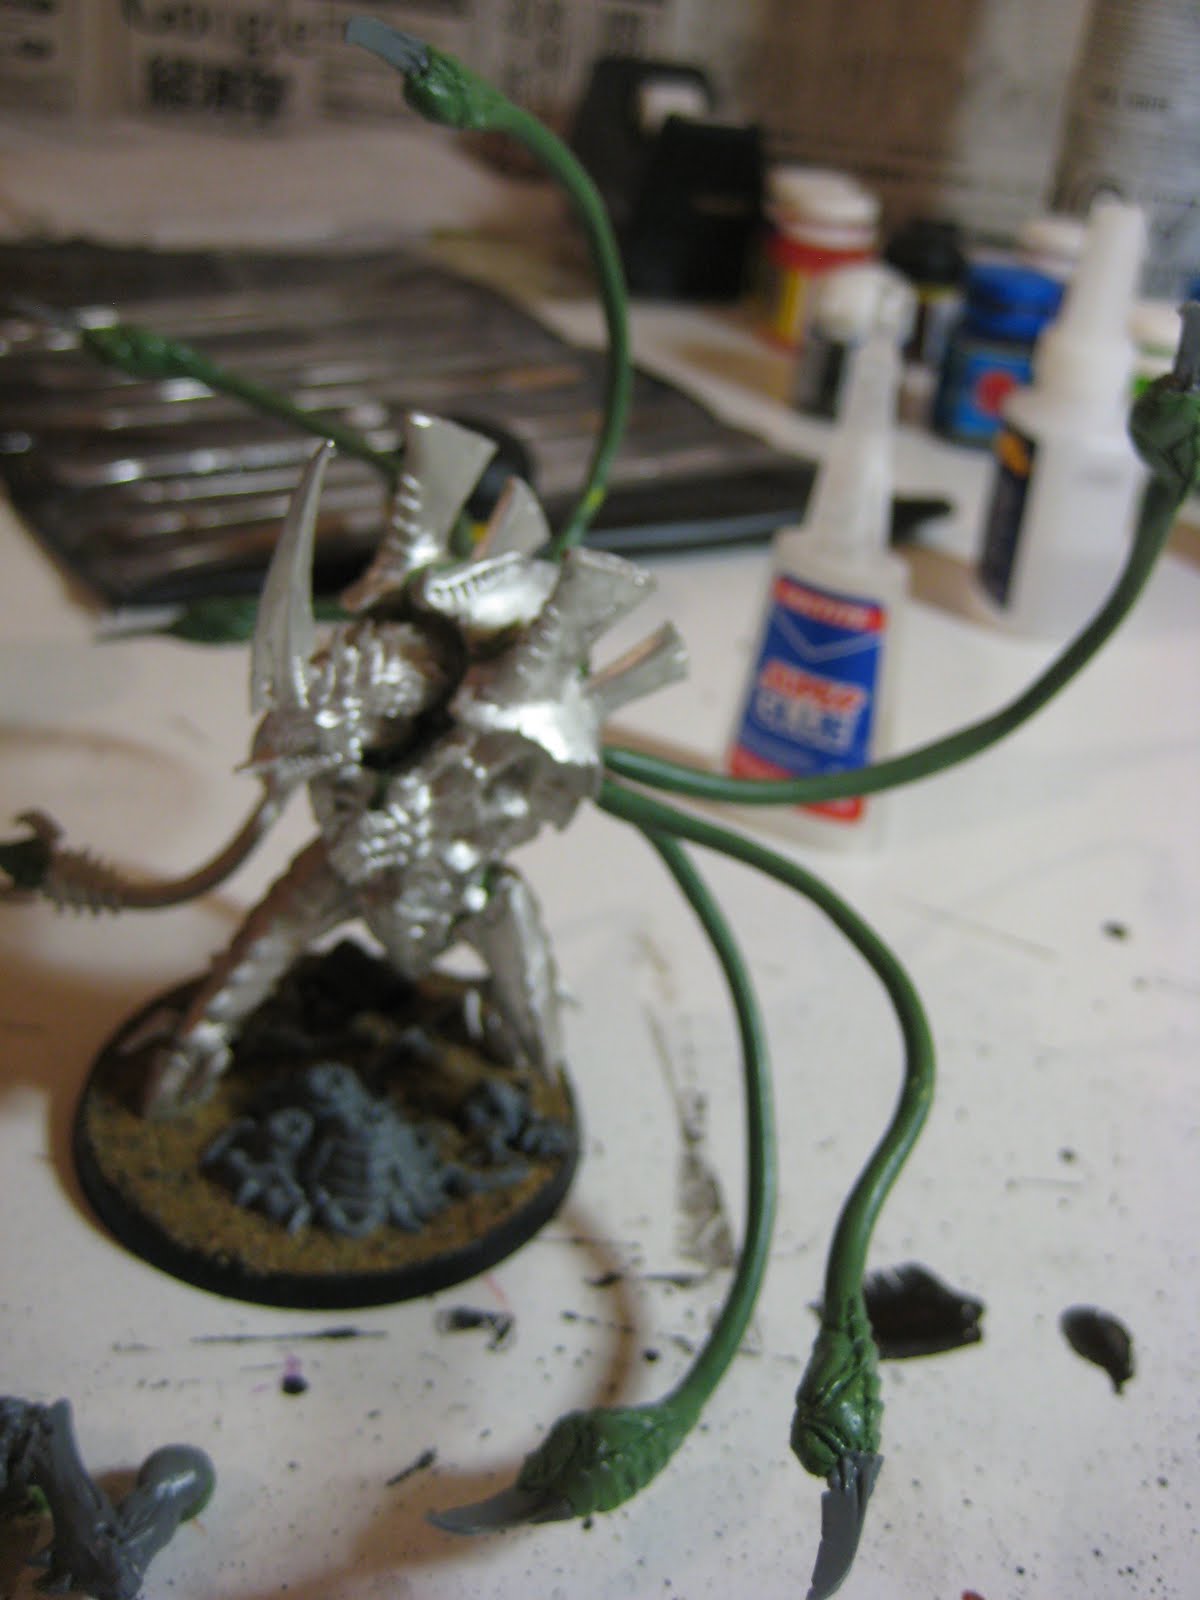
ALMOST FINISHED. I have to say that in the beginning, I thought I ruined a perfectly good Tyrant by cutting the lower two sets of back vents, and just made myself $37.50 + IL tax worth of 'Nid spare parts. It started out as an idea to put insect wings on thim... but that quickly went out the window with the direction my swarm was taking... It took time, but like all good inspirations, it came to me one day at the most random place- Work. "What if I used a buttload of copper wire and some greenstuff...?" I'm pleased to share the semi-final results.


Ta-daaaah! At first, I thought the tentacles were a bit too long, but it turns out they were perfect, any shorter, and they would't look convincing as weapons. Any longer, and they'd start getting in the way of the arms and manipulating them would be a chore.


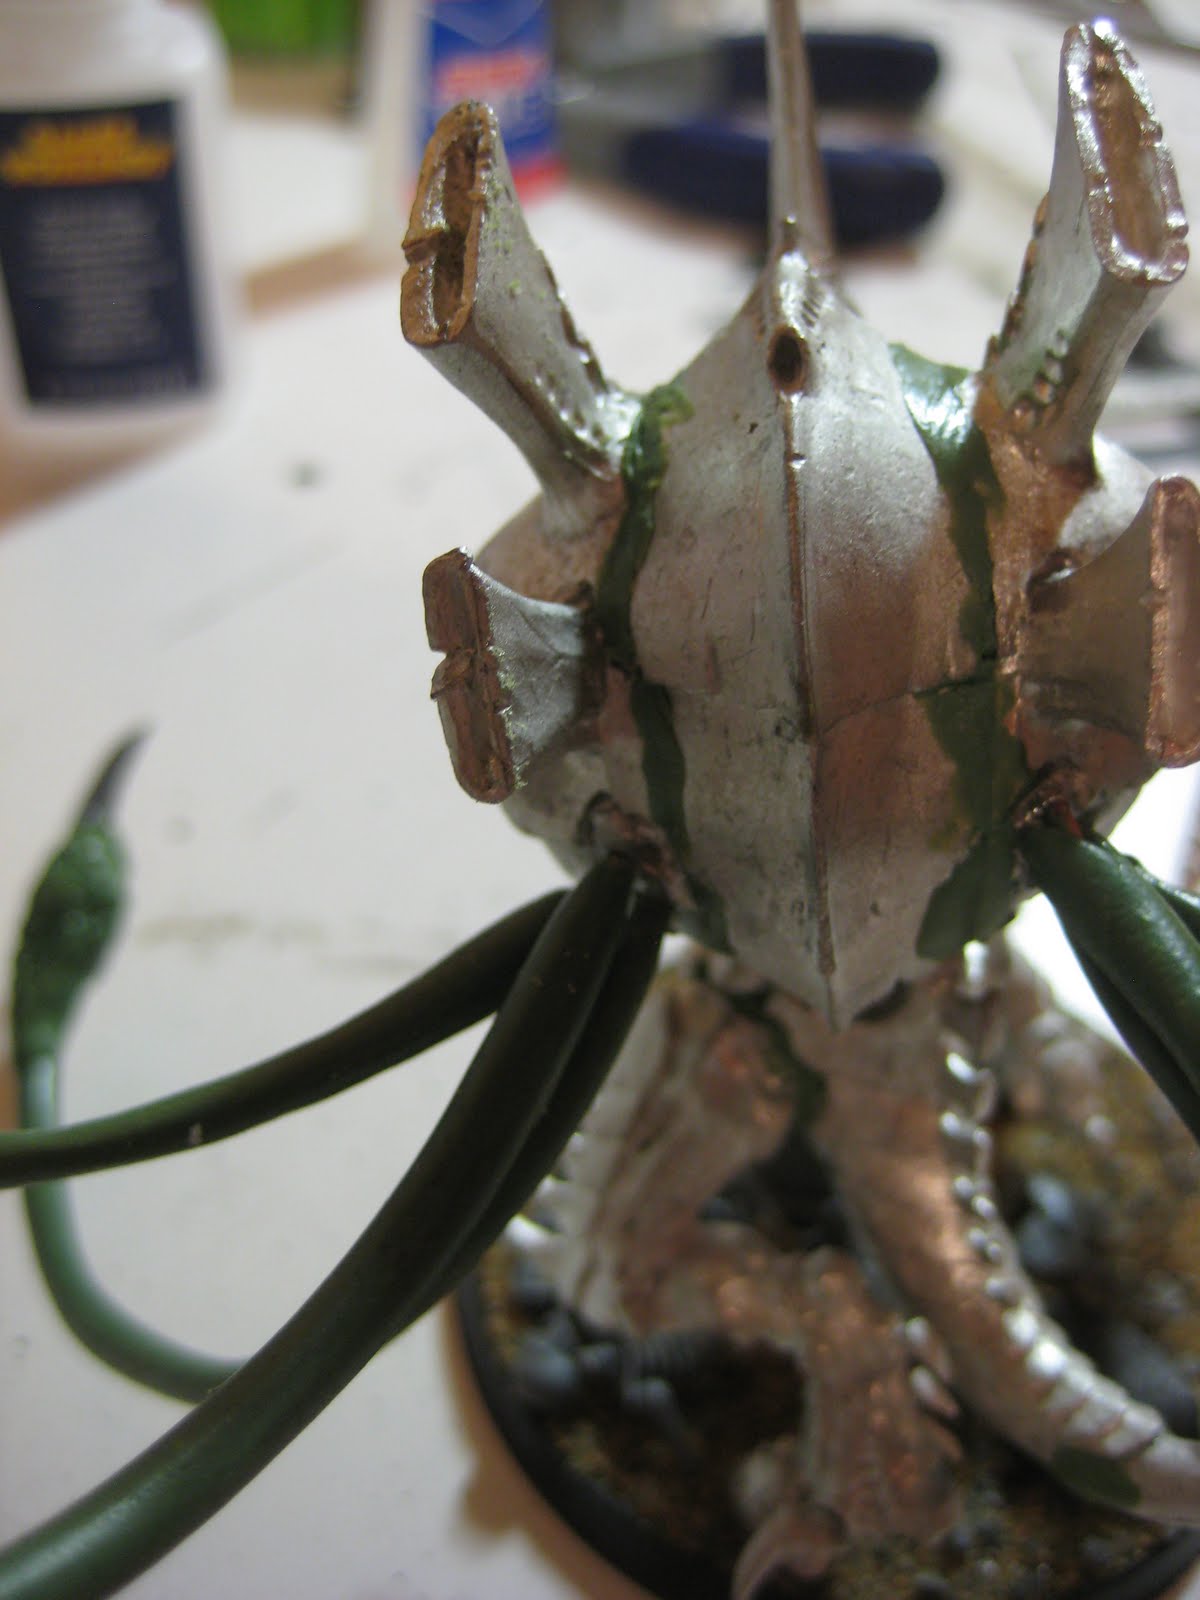
Here's a shot of the back- the tentacles I'll do a totally separate how-to guide in the future, but for the body itself, I used the GW hobby drill to make 1~1.5cm-deep holes into the Tyrant torso. It was a bit tricky, (if you're familiar with the kit, you know there are "pockets" in the body itself) but after lots of cursing, sweating, and drilling, I got holes I was satisfied with. Also, because there are pockets, you'll see your drill slip through at times, but find yourself unable to guide the wire into them... go figure. I suggest at this point, I suggest moving the drill back and forth, while rotating it... and that came out wrong... NEXT!!


A shot of the magnetized arms. Seeing as how both magnets will hold/slide their separate arm pieces (gun arm and sac arm), I felt it best to glue them together. Now, the I have the weapons clinging with the plastic "pinch" as well as the magnet strength.


A side shot of the Octo-rant in full gear- Scythes and Venom Cannon. I'll defitely invest in another set of Scythes. Absolutely dead-sexy!!


Slightly raised shot of the Octorant. Any ideas what those tentacles could represent? I'm thinking the Poisoned Biomorph, but that'll be an absolute waste of points on my cousins' Toughness 3 IG army... (he's totally anti-ogryn... I agree. Ugly buggers)


I can imagine this guy painted. The bulbous portions on the ends will definitely be a lighter "glowing" blue, like the innards of most of the monsters... or the poison green a la the Zoanthrope brain. Either way, Glow-stick-Raving Tyrant anyone??

And even now I'm not done. The final addition will be the "housings" for these tentacles. I've thought of the beetle wing "covers" triangle-shaped concave shell... OR... like those undersea tube animals that live near volcanic vents... basically a play on the backvents of the standard Tyrant- wider, with cut-outs to fit the shells of the individual tentacles.

Stay tuned!